PoliciesAdmin Guide
Admin Guide
Step-by-step guide for managing policies in the dashboard
Policy Management Admin Guide
This guide covers how to create, configure, and manage travel policies in the Rahal Corporate dashboard.
What You'll Learn
Creating Policies
Create a new policy with basic settings
Configuring Flight Rules
Set up flight rules with routes, budgets, and cabin classes
Configuring Hotel Rules
Set up hotel rules with locations, prices, and star ratings
Policy Assignments
Assign policies to roles and users
Reason Codes
Create reason codes for policy violations
Monitoring Violations
Track and analyze policy violations
Prerequisites
Before managing policies, you need:
- Admin role in your company
- Read Policies and Manage Policies permissions
- Understanding of your company's travel requirements
Dashboard Navigation
Access policy management from the dashboard:
- Log in to the Rahal Corporate Dashboard
- Navigate to Policies in the sidebar
- You'll see:
- Policies - List of all policies
- Assignments - Manage policy assignments
- Violations - View all policy violations across your company
- Reason Codes - Manage violation reason codes
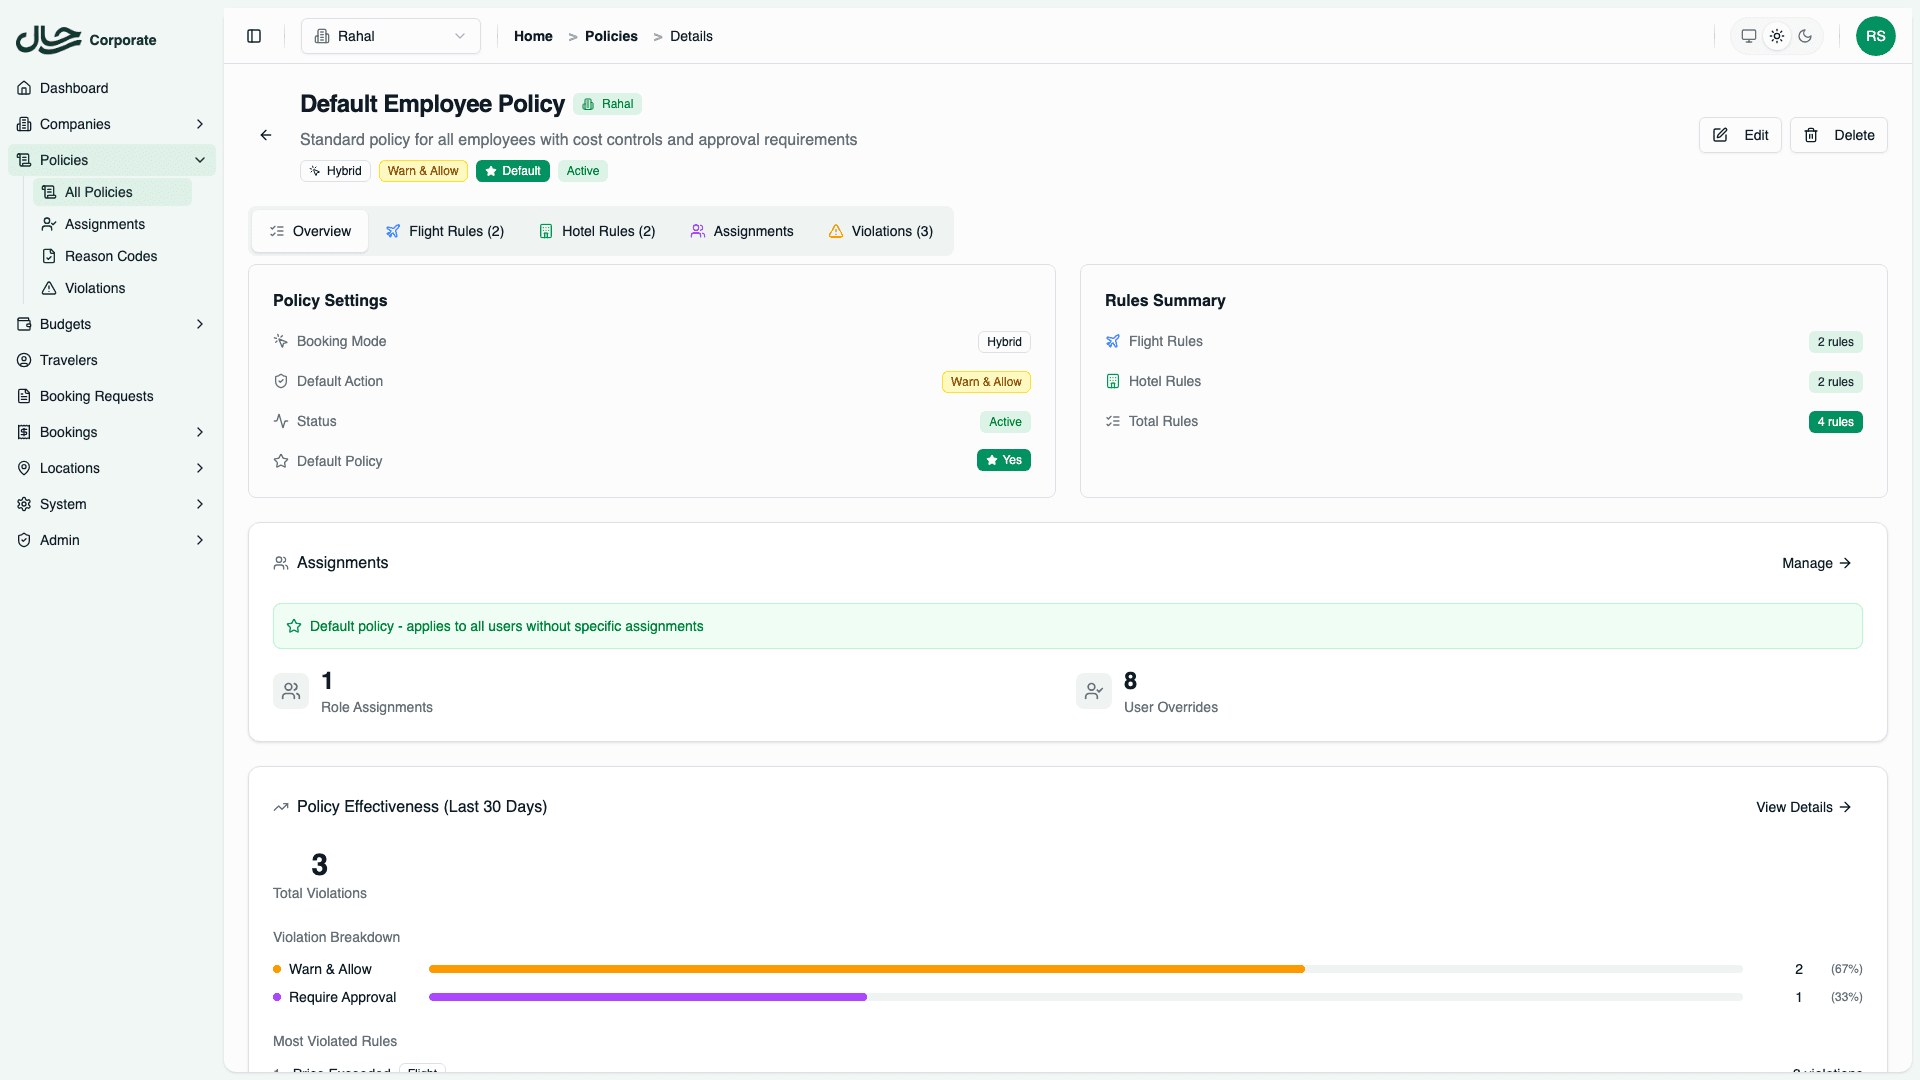
Policy Detail Page
When you open a policy, you'll see five tabs:
| Tab | Purpose |
|---|---|
| Overview | Policy settings, rules summary, assignments summary, and violation analytics |
| Flight Rules | Manage flight policy rules (routes, budgets, cabin classes) |
| Hotel Rules | Manage hotel policy rules (locations, prices, star ratings) |
| Assignments | Assign the policy to roles or individual users |
| Violations | View detailed violation logs for this specific policy |
Overview Tab
The Overview tab provides a summary of the policy including:
- Policy Settings - Booking mode, default action, status, and default policy flag
- Rules Summary - Count of flight and hotel rules
- Assignments Summary - Count of role and user assignments with quick manage link
- Policy Effectiveness - Violation analytics showing trends and top violated rules
Quick Start
Create Your First Policy
- Go to Policies
- Click Create Policy
- Enter:
- Policy name (e.g., "Standard Travel Policy")
- Booking mode: Hybrid
- Default action: Require Approval
- Toggle Set as Default Policy to Yes
- Click Create
Add a Flight Rule
- Open your policy
- Go to Flight Rules tab
- Click Add Rule
- Configure:
- Route: All flights
- Budget: 500 USD
- Cabin: Economy, Premium Economy
- Click Save
Add a Hotel Rule
- Go to Hotel Rules tab
- Click Add Rule
- Configure:
- Location: All hotels
- Price: 150 USD per night
- Stars: 3, 4 stars
- Click Save
Assign the Policy
- Go to Assignments tab
- Click Assign to Role
- Select Member role
- Click Assign
Your policy is now active for all Member users.
Next Steps
Continue with detailed guides:
- Creating Policies - Full policy creation walkthrough
- Configuring Flight Rules - Advanced flight rule configuration
- Policy Assignments - Role and user assignments